Hello YouTube: How to make green tea ice cream without an ice cream maker

For me, part of the idea of living fully is to live simply. And in trying to embrace living simply, I’ve been practicing how to become more self-sufficient…which in the kitchen translates into learning how to make as many things as possible from scratch instead of buying it already pre-made. Living simply in the kitchen also means trying to get away with as few speciality appliances as absolutely necessary (e.g., the ice cream maker).

One of my minor obsessions this summer was making homemade ice cream without an ice cream machine. Click here,  here and here to read about my other ice cream making adventures.  Continue reading

Zucchini bread in a jar

After sending some vacuum-sealed baked goods to my sister who is currently serving in Afghanistan only to find out that they arrived 3 weeks later, with mold, I discovered that you could bake cakes in Mason jars and that they would essentially be preserved (due to the sealing of the jars). Read here for my first attempt. My sister did receive the first cake-in-a-jar that I attempted. I mailed the first batch of pineapple cake on October 5. She told me that she opened the jars and ate the cake on October 23, almost 3 weeks later—and they were fresh! So I asked her if she had any requests for the next batch and she said since they don’t have a lot of access to fresh produce and fruit that she would like zucchini bread. So, here is my attempt with zucchini bread in a jar.

Ingredients:

8-10 pint canning jars (or the equivalent in a larger size) with rings and new lids (I only had 6, so I used these and then made a separate mini loaf.)

3 c flour

1 t salt

1 t baking soda

1 t baking powder

2 t cinnamon

1/4 t nutmeg

1/4 t cloves

2 c zucchini (~1 medium zucchini)

2 c granulated sugar

1 c margarine—at room temperature (I used 1 stick of butter (1/2 c) and then 1/2 c of applesauce

1 t vanilla

3 egg whites—whipped

1. Boil jars, lids and rings for 10 minutes. Dry jars. Leave rings and lids in hot water while preparing the batter.

IMG_0641

2. Preheat oven to 325 degrees.

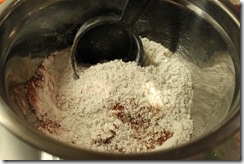
3. Mix flour, salt, baking soda, baking powder, cinnamon, nutmeg, and cloves in one bowl.

IMG_0642

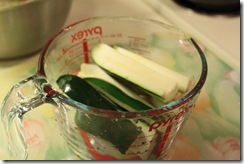
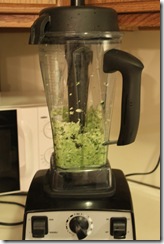
4. Grate zucchini. I used the Vitamix to grate my zucchini. I put the lid on the Vitamix and removed the plug. Turned the Vitamix on to Speed 5-6 and put in the large pieces of zucchini. Wah-lah…grated zucchini with no bloody knuckles.

IMG_0639IMG_0640 

Continue reading

Have your cake (and ice cream) and eat it to: Birthday cake ice cream for the birthday girl

I no longer have a need for Coldstone Creamery in my life anymore. For any of you birthday cake ice cream addicts like me, you may want to read on. I love ice cream with stuff in it: brownies, cookie dough, cookies, pie crust, candy, etc. My all-time favorite is birthday cake ice cream. R knows this weakness of mine and will regularly take me to get the “massage ice cream” (aka Coldstone Creamery). For any of you not familiar with Coldstone, it is an ice cream chain that puts a couple of scoops of ice cream on an ice cold piece of marble and “massages” the topping of your choice in with metal paddles. This “massaging” in of your topping ensures that through the last bite you still have topping to eat not like the places where they just put the topping on top so your just left with plain ice cream at the bottom. I usually go in to Coldstone wanting to get something new, but always end up getting the delicious birthday cake ice cream with yellow cake mixed in. It is great because you really get to have your cake (and ice cream) and eat it too. Anyways, it is a sad day for Coldstone as they have lost me as a customer because I now can make birthday cake ice cream at home! I was inspired to try to make this by my friend, J, who recently made it in her Vitamix. I unfortunately did not make this in the Vitamix, so those of you without a VM can try this too. Oh, and it doesn’t require an ice cream maker either because I discovered this summer that you definitely don’t need an ice cream maker to make delicious homemade ice cream.

Here’s what I did:

Ingredients:

1 1/2 cups skim milk

1/2 c granulated sugar

2/3 c cake mix (I used yellow, but I’m sure you can use whatever flavor you’d like)

1 1/2 c heavy whipping cream

1 tsp vanilla extract

sprinkles

Continue reading

1-minute homemade peanut butter in the Vitamix

So, peanut butter is another of those things that I had been wanting to try to make in the Vitamix, but was waiting until I used up the last of my commercial PB. Making homemade peanut butter is too easy not to share how it is done. Making your own nut butters can be great, especially if you tend to buy some of the more expensive nut butters like almond butter or cashew butter (which can be made the exact same way as the PB). I knew this was going to be pretty easy, but had no idea it would be this easy.

Here’s what I did:

I started with a couple of cups of roasted peanuts. I bought them unshelled (from the Asian market) and roasted them myself (20min in 350 degree oven). I debated taking off the skin, but in the end was too lazy.
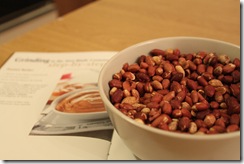
IMG_0599

Put the nuts in the Vitamix. Cover with lid and tamper.
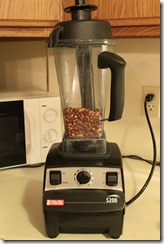
IMG_0600

Blend on High for 1 minute or so, using tamper to send nuts to blades. My PB was probably done around 45 seconds, but since this was my first time, I wanted to make sure it was really creamy and blended for the full minute.

Here’s what you get. Fresh, homemade creamy peanut butter.
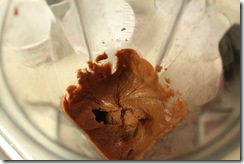
IMG_0601 IMG_0602

R thought I put chocolate into it because it looks darker than commercial PB, but I think it just came out this color because I roasted my nuts a long time and left the peanut skins on (more fiber, right?). If you want crunchy PB, I suspect you just save some nuts to add in towards the end of the 1-minute blend time. Now, that I know that making nut butters in the VM is super fast and easy, I’m going to try to make cashew, almond, macadamia nut and sunflower seed butters. Oh, you can also add in salt and sugar during the blend if you like, but I prefer au natural. Plus, eaten with apples or bananas, there’s no need for added sugars or salt.

If you have a Vitamix, this is definitely something you should try to make. But I will admit, the normal ‘30-second blending with soapy water’ didn’t quite clean it the same as it does with smoothies. But, every now and then my VM definitely needs a good scrub. I also let it soak with hot, soapy water to get rid of the PB underneath the blades. This worked just fine.

Yield: ~2 cups of nuts made 1 cup of nut butter

Click on the Vitamix button below to order your own or use code 06-005573 at checkout to receive free shipping ($25 value).

Making my own reality

As I about a week away from entering a new decade, I thought I would give you an update on how I was doing with establishing my 3 new habits. Accomplishing #3 on my Thirty before 30 list had to be my worst favorite thing to do. I think because it was the one thing on my list that took the most perseverance. I get into ruts. Do you? One of my New Year’s Resolutions from 2009 was to become an early riser. Surprisingly, I did fairly well with that resolution even into 2010—that is until this summer. We had returned from a month of being in Taiwan and I just couldn’t whoop that jet lag. So, I started sleeping in later than I wanted. During the school year, I usually try to get up before 7, most mornings getting up around 5:30 am. So, how did I do with (re-)establishing habit #1? Continue reading