Roasted chicken thighs with root vegetables

When I first got married, I could not bake chicken for the life of me. No matter what temperature I baked it at or for how long, when I served it, it would still be pink (or even bloody) in the middle. After almost 8 years of marriage, I have finally perfected a baked chicken recipe that is simple and healthy. This recipe can be adapted to accommodate any type or amount of vegetables you have on hand. I served this with the quickest dinner rolls from scratch I’ve ever made before (see recipe here).

Roasted chicken thighs with root vegetables (adapted from here)

The amounts listed below are what I had in the fridge.

Ingredients:

8 chicken thighs (I used skinless, boneless.)
2 carrots, peeled and cut into chunks
2 celery stalks, cut into large pieces
2 kohlrabi, peeled and cubed
non-stick cooking spray
5-6 small, unpeeled new potatoes, cubed
1 onion, cut into large pieces
1 T salt
2 t dried thyme
1 1/2 t ground black pepper
1/4 ground nutmeg

Directions:

1. Preheat oven to 450°F.

2. Mix salt, thyme, 1½ teaspoons pepper, and nutmeg in small bowl.

3. Spray a 9×13-inch baking pan with nonstick spray. Place vegetables in the pan.

4. Sprinkle half of the spice mixture on the vegetables.

5. Lay the chicken over the vegetables. Sprinkle the remaining spice mixture on the chicken.

6. Cover with foil and bake until the chicken is golden and cooked through, about 45 minutes. Serve.

Comment love: What are you favorite chicken recipes?

Open sesame: How to make roasted sesame milk

For all of you looking for milk alternatives and are wanting to try something besides soy or almond milk, give this a try. Sesame milk (contains no milk) tastes wonderful and is almost reminiscent of a “peanut-buttery milk”.

Roasted sesame milk

Ingredients:

2 cups of water

3/4 cups of sesame seeds

Directions:

1. Toast sesame seeds in oven @ 350 degrees for about 5 minutes.

2. Place all ingredients in Vitamix blender and secure lid.

3. Start machine at Variable 1 and quickly increase to Variable 10. Then, switch to high.

4. Blend for about 2 minutes or until desired consistency.

5. Strain using cheesecloth or nut milk bag (shown below) and/or add sweetener if desired.

After I strained the milk, I only had a tiny bit of nut pulp left. You could add this to a bread dough (e.g., banana bread). I added mine to my compost pile. (Click here for post on how to compost apartment-style.)

6. Store in the refrigerator or enjoy immediately! (I store mine in an “upcycled” glass peanut butter jar.)

Notes:

I used my toaster oven to toast the seeds, so it was pretty quick. Actually, the sesame seeds that I had were already labeled as “roasted”, but the recipe I used said that toasting seeds improves the slight bitter flavor of the “milk”, so I wasn’t taking any chances.

The recipe makes 2 cups, but the batch that I made in the pictures is only 1/2 of the recipe.

I made this using my Vitamix. I’m sure you could make it in a regular blender, but because it does require that you blend for about 2 minutes, I would be afraid that a regular blender couldn’t handle it. (It was when I tried to make things like this, that I burnt out several “regular” blenders and decided to get a Vitamix. Click here for more information on how to purchase a Vitamix (30-day money back guarantee–so if you don’t like it, you can always send it back–although I doubt you will). Using this link will provide free shipping (a $25 value).

If they sell donut holes, where do all the bagel holes go?

For those of you following my adventures in the kitchen through this blog, you know that I love trying to make things from scratch, like fruit leather, Shanghai soup dumplings (xiao long tang bao), or green tea  and birthday cake ice cream. Many of you probably are wondering why in the world would you make yogurt from scratch [or insert food], when you can buy them for 0.40 [insert insanely cheap price] at the store? Here are some of the reasons I’m up for the challenge of  DIY food:

1) Sometimes things really do taste better homemade.

2) Sometimes things really are cheaper homemade.

3) It’s “greener”. It reduces packaging waste and doesn’t contribute (much) to my carbon footprint.

4) I can control what goes into what I make. I don’t need to add preservatives, unecessary colorings or flavor enhancers.

5) It’s fun to know “where your food comes from.”

6) It makes me feel more “domesticated”. ( :

Making food from scratch doesn’t always make sense. Some recipes take way too long to prepare and only taste slightly better than store-bought like my Taiwanese pineapple cakes. But nonetheless it’s fun.

So, I wanted to share with you my attempt at homemade bagels. Continue reading

Vitamix does fruit roll-ups

On their website, Vitamix boasts that this amazing “blender” can tackle 52 amazing food feats. Well, I’m proud to say I’ve discovered food feat #53.

Before Christmas break, I stuck some apples in the fridge…and forgot about them…until yesterday. Now, when it comes to apples, I’m pretty snobby. I really like a crisp, crunchy apple. I do not do mealy apples. I’ve recently discovered honeycrisp apples (or as R likes to call them: “honeycripsy” apples) and if any of you have ever ate one, you know exactly what a delicious apple should taste like. Sorry Gala and Fuji but I’ve found a new love. But, I deter. Back to the old, mushy apples in the fridge. Yesterday, I pulled them out of the fridge just to see how “bad” they really were. Secretly, I was hoping that they were rotten and I could just toss them. But suprisingly, they “looked” decent. Well, I knew they weren’t good enough for this “apple snob” to eat directly. So, I remembered that I had been wanting to try to make fruit leather from scratch. Do you remember eating Fruit Roll-Ups as a kid? I thought this would be the perfect way to use up my “old” fruit.

Here’s what I did:

Continue reading

update: Thirty before 30

I fully intended to update you on the progress of my TB30 list the day after my 30th birthday (which was about 2 months ago). Better late than never, huh?

Although I wasn’t able to finish everything on my list, it was still loads of fun trying to.

Here’s a repost of my TB30 list with some added commentary from yours truly. Continue reading

Xiao long tang bao (Shanghai steamed soup dumplings)

This year R and I decided that we weren’t going to celebrate our birthdays and anniversary with gifts in order to save money (and plus neither of us really need/want anything). So, we promised each other we wouldn’t buy anything. Well, giving gifts must be a love language for me. I just couldn’t resist doing something for R’s birthday. Each year, the tradition so far has been to cook him a special birthday dinner. It’s usually lamb because he really loves it and it’s something that we don’t make on a regular basis. But in the last couple of months (ever since returning from our summer trip to Taiwan), I can’t tell you how many times he has mentioned xiao long bao. If you’ve never heard of these or eaten these, they are the most delicious dumpling you will ever have. What makes them extra special is that there is a gushing of delicious, savory soup inside each dumpling that escapes and dribbles down your chin as you bite into its tender, slightly chewy skin. If you ever go to Taiwan (or are in a restaurant that serves these), this is a must-eat kinda food. So, in my quest to become a good Taiwanese wife, I decided to attempt to make these and enlisted my roommate (a wonderful cook) to help. Attempting the make these is definitely not for the faint of heart. They take a lot more effort than the usual speedy Taiwanese recipes that we make on a day-to-day basis. Since the first time that I made these about 3 weeks ago, I have made them twice since and found that each time it does get easier.

The recipe below is a translation of something my roommate found online, along with some adjustments from trial and error. Continue reading

Hello YouTube: How to make green tea ice cream without an ice cream maker

For me, part of the idea of living fully is to live simply. And in trying to embrace living simply, I’ve been practicing how to become more self-sufficient…which in the kitchen translates into learning how to make as many things as possible from scratch instead of buying it already pre-made. Living simply in the kitchen also means trying to get away with as few speciality appliances as absolutely necessary (e.g., the ice cream maker).

One of my minor obsessions this summer was making homemade ice cream without an ice cream machine. Click here,  here and here to read about my other ice cream making adventures.  Continue reading

Have your cake (and ice cream) and eat it to: Birthday cake ice cream for the birthday girl

I no longer have a need for Coldstone Creamery in my life anymore. For any of you birthday cake ice cream addicts like me, you may want to read on. I love ice cream with stuff in it: brownies, cookie dough, cookies, pie crust, candy, etc. My all-time favorite is birthday cake ice cream. R knows this weakness of mine and will regularly take me to get the “massage ice cream” (aka Coldstone Creamery). For any of you not familiar with Coldstone, it is an ice cream chain that puts a couple of scoops of ice cream on an ice cold piece of marble and “massages” the topping of your choice in with metal paddles. This “massaging” in of your topping ensures that through the last bite you still have topping to eat not like the places where they just put the topping on top so your just left with plain ice cream at the bottom. I usually go in to Coldstone wanting to get something new, but always end up getting the delicious birthday cake ice cream with yellow cake mixed in. It is great because you really get to have your cake (and ice cream) and eat it too. Anyways, it is a sad day for Coldstone as they have lost me as a customer because I now can make birthday cake ice cream at home! I was inspired to try to make this by my friend, J, who recently made it in her Vitamix. I unfortunately did not make this in the Vitamix, so those of you without a VM can try this too. Oh, and it doesn’t require an ice cream maker either because I discovered this summer that you definitely don’t need an ice cream maker to make delicious homemade ice cream.

Here’s what I did:

Ingredients:

1 1/2 cups skim milk

1/2 c granulated sugar

2/3 c cake mix (I used yellow, but I’m sure you can use whatever flavor you’d like)

1 1/2 c heavy whipping cream

1 tsp vanilla extract

sprinkles

Continue reading

1-minute homemade peanut butter in the Vitamix

So, peanut butter is another of those things that I had been wanting to try to make in the Vitamix, but was waiting until I used up the last of my commercial PB. Making homemade peanut butter is too easy not to share how it is done. Making your own nut butters can be great, especially if you tend to buy some of the more expensive nut butters like almond butter or cashew butter (which can be made the exact same way as the PB). I knew this was going to be pretty easy, but had no idea it would be this easy.

Here’s what I did:

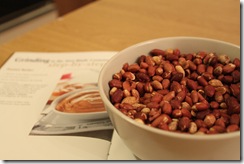
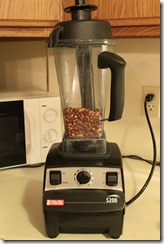
I started with a couple of cups of roasted peanuts. I bought them unshelled (from the Asian market) and roasted them myself (20min in 350 degree oven). I debated taking off the skin, but in the end was too lazy.

IMG_0599

Put the nuts in the Vitamix. Cover with lid and tamper.

IMG_0600

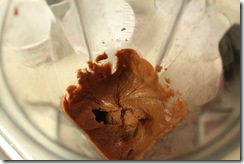
Blend on High for 1 minute or so, using tamper to send nuts to blades. My PB was probably done around 45 seconds, but since this was my first time, I wanted to make sure it was really creamy and blended for the full minute.

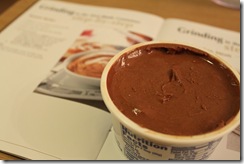
Here’s what you get. Fresh, homemade creamy peanut butter.

IMG_0601 IMG_0602

R thought I put chocolate into it because it looks darker than commercial PB, but I think it just came out this color because I roasted my nuts a long time and left the peanut skins on (more fiber, right?). If you want crunchy PB, I suspect you just save some nuts to add in towards the end of the 1-minute blend time. Now, that I know that making nut butters in the VM is super fast and easy, I’m going to try to make cashew, almond, macadamia nut and sunflower seed butters. Oh, you can also add in salt and sugar during the blend if you like, but I prefer au natural. Plus, eaten with apples or bananas, there’s no need for added sugars or salt.

If you have a Vitamix, this is definitely something you should try to make. But I will admit, the normal ‘30-second blending with soapy water’ didn’t quite clean it the same as it does with smoothies. But, every now and then my VM definitely needs a good scrub. I also let it soak with hot, soapy water to get rid of the PB underneath the blades. This worked just fine.

Yield: ~2 cups of nuts made 1 cup of nut butter

Click on the Vitamix button below to order your own or use code 06-005573 at checkout to receive free shipping ($25 value).

You’d be nutty not to make this: Almond milk in the Vitamix

Recently, you might have noticed Blue Diamond has made commercially available almond milk. Almond milk is a great alternative for those who don’t like or can’t tolerate milk or soymilk. It’s cholesterol-free and has a delicious nutty flavor. It surprisingly isn’t as expensive as I thought it might be, a half gallon costing a little more than a gallon of milk (if I remember correctly). Well, I tasted and thought it was pretty good. But if you know me, in my quest to become more domesticated, I wanted to see how difficult it would be to make almond milk from scratch. Again, this was another thing that was on my list of things I wanted to try with the Vitamix, but haven’t got around to it until tonight. (It seems that every time I have almonds in the house, I end up making these.)

Here’s how I did it:

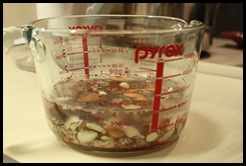
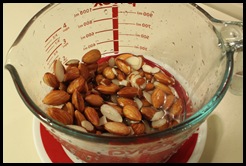
Soak 3/4 cup almonds overnight in water. You can use whole almonds or sliced. I had both, so I used both.

IMG_0131

After soaking, rinse them until the water runs clear. They will be puffy.

IMG_0150  

Continue reading

5-minute plastic bag ice cream

I’m not sure what my obsession this summer with ice cream is all about, but for some reason, I keep Googling different ways to make ice cream So, far this summer, I have made mango ice cream, strawberry ice cream (both in the Vitamix), green tea ice cream and sesame seed ice cream (both on the stove and by mixing my hand) and my latest adventure yesterday was “How to make 5-minute plastic bag ice cream”. Here are the simple list of ingredients: Continue reading

niu rou mian_1st attempt: A-

Here was my first attempt at Taiwanese Beef Noodle soup. Recipe courtesy of R.

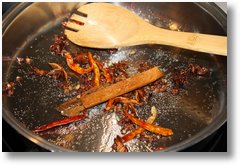
First, I pan fried all the seasonings.

Picture 014

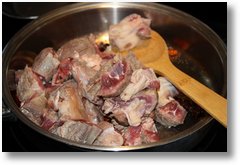
Then, added in the beef shank from our local butcher.

Picture 015

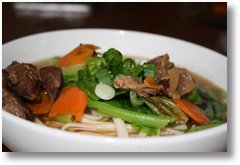
Here is the finished product. I served it for lunch on Sunday (Taiwanese Father’s Day) for R and I and J and M (Taiwanese restaurant owners). I ate mine with egg noodles (the yellow colored ones) and everyone else had the white noodles. The kick from the peppercorns and dried chilis was delightful. Noone died, so I give myself an A-.

Picture 018

Here are my recipe notes from R:

oil, star anise (11), dried chilies (12), peppercorns (small tablespoon), Chinese bark (2 pieces), salt (10 turns of the salt grinder), 4 scallions (break into 3rds by hand)–fry all this together, low heat

cut shank meat. cook in boiling water for about 3-5 minutes.

add meat to seasoning mixture. cook all on high heat until meat almost cooked (~5-7 minutes).

put meat and mixture into big pot with water and cook on high heat.

add 1 Corell-sized bowl of soy sauce and 1/2 the amount of rice wine.

add 1/4 c sugar

skim off the yucky stuff as it cooks. after soup boils, reduce heat to low-ish and continue to simmer for about 1 to 1.5 hours, or until meat is super tender.

taste broth before serving with noodles. if not salty enough, can add salt or soy sauce.

serve with preserved mustard greens and/or hot peppers/relish.

notes: added scallions (chopped up with knife) on top of noodle soup as garnish, but didn’t really like “raw” taste of scallions with this soup. next time will probably follow recipe and cook scallions. may add very small amount of really finely chopped green onions as garnish (b/c it is very pretty).

seasonings and amounts listed make a mild to medium hot broth. may want to decrease chilies and/or peppercorns (ma la) for guests who don’t eat spicy food.

made enough for 4 generous bowls, plus leftovers for 3 more servings.

making tai yang bing (Taiwanese Sun Cakes)

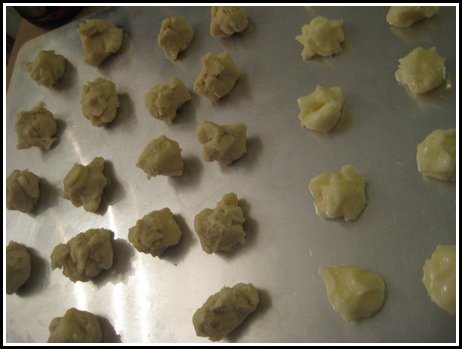
Tonight I attempted to make Taiwanese Tai Yang Bing.

Picture 006

The recipe I used calls for 3 different doughs: a water dough (the blobs on the left), the oil dough (the blobs in the middle) and the filling (the light-colored blobs on the right). The ingredients are simple. Mostly flour (all-purpose and cake), confectioner’s sugar, maltose, shortening and butter. Surprisingly, they weren’t as hard as I thought they would be to make. Continue reading